

How To Remove Sound Devices From Windows 10
How to Enable or Disable a Sound Output Device in Windows ten
In Windows ten, the user can specify the default sound output device. This can be speakers, a Bluetooth device, headphones, or other sound device connected to your PC or congenital into your device. Today, we volition see how to disable or enable a sound device in Windows x.
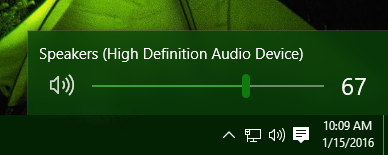
Windows x introduced a new style of items and their panes/flyouts which open from the notification surface area. All of the applets which open from the system tray are different now. This includes the Date/Fourth dimension pane, the Action Eye, the Network pane and even the volume control. In one case y'all click the sound icon in the system tray, the new book indicator will appear on the screen.
Note: In a number of situations, the Volume icon can be subconscious in the taskbar. Even when yous have all the drivers installed, the icon might remain inaccessible. If y'all are afflicted by this upshot, see the post-obit post:
Ready: Volume Icon is Missing in Windows 10 Taskbar
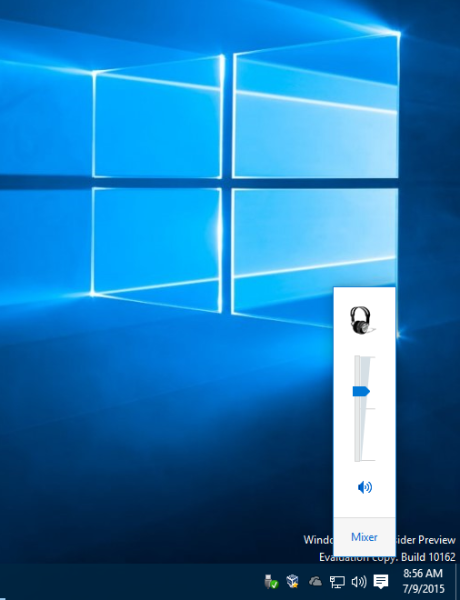
Tip: Information technology is still possible to restore the skilful old "classic" sound book control.
Refer to the post-obit commodity:
How to enable the former Volume control in Windows x
The default sound input device is the device that the operating organization uses to record or hear sounds. If you have connected several audio devices to your PC or laptop, such every bit microphones, a web camera with a built-in microphone, a Bluetooth headset, you might want to disable 1 or a few of them. This can be done with Settings, Device Manager, using the classic Control Panel, or with a Registry tweak. Let's review these methods.
To Disable a Sound Output Device in Windows 10,
- Open the Settings app.
- Get to System > Sound.
- On the correct, select the sound output device under Output.
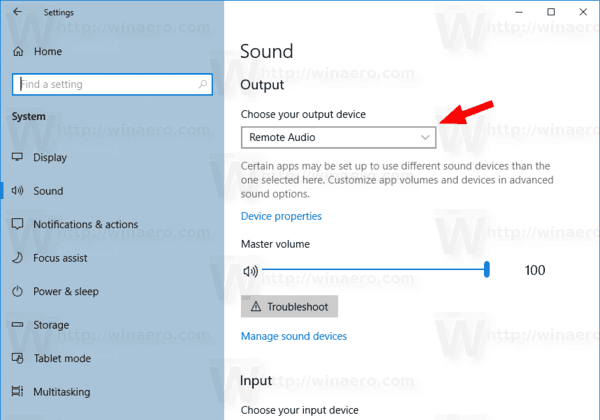
- Click on the Device Properties link.
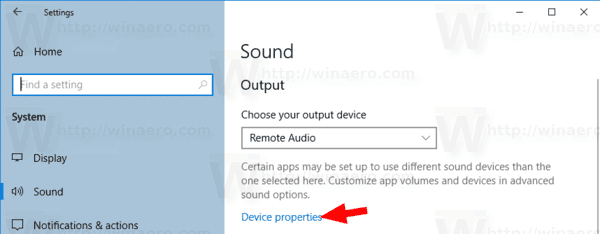
- On the adjacent page, check the Disable box to disable the device. It is unchecked by default.
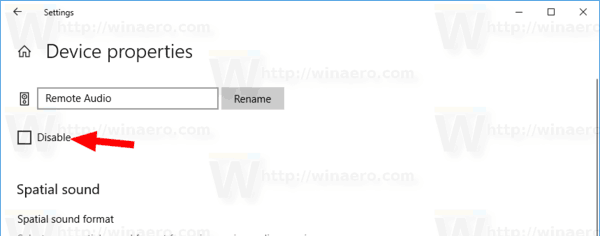
- Uncheck the Disable box to re-enable the device.
You are done.
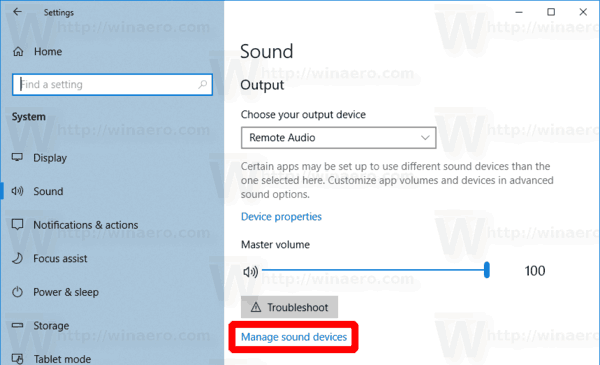
Also, there is an actress page in Settings that you can use to disable sound devices. It is called Manage sound devices.
Disable a Sound Output Device with Manage sound devices Page
- Open the Settings app.
- Go to System > Sound.
- On the right, click on the linkManage sound devices under Output.
- On the next page, select your audio output device in the list inOutput devices.
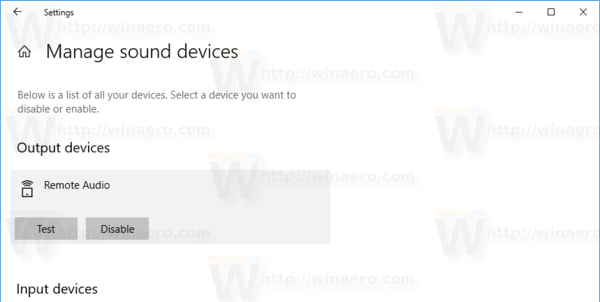
- Click on theDisable button to disable the selected device.
- Click on theEnable button to enable the disabled device.
You are done.
Besides the Settings app, yous can utilise the skilful old Device Manager app to enable or disable devices, including the audio devices installed in your computer.
Disable Audio Output Device in Device Manager
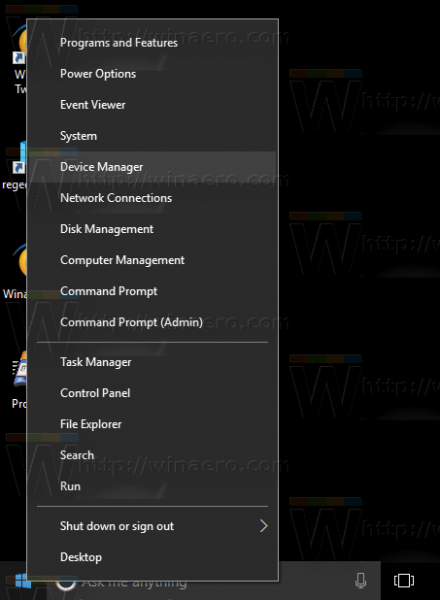
- Press Win + 10 keys together on the keyboard and click Device Manager.

Tip: yous can customize the Win + X menu of Windows 10.
- In the device tree, find your device nether Audio inputs and outputs.
- Correct-click on the device and select Disable from the context menu to disable information technology.
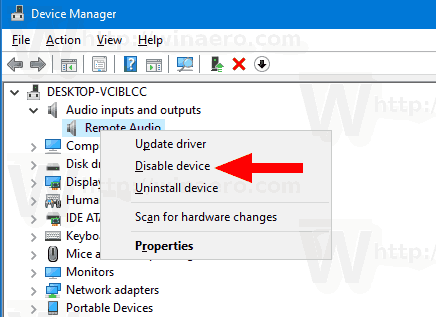
- To enable the disabled device, right-click on it and selectEnable from the context carte du jour.
- Ostend the operation if prompted.
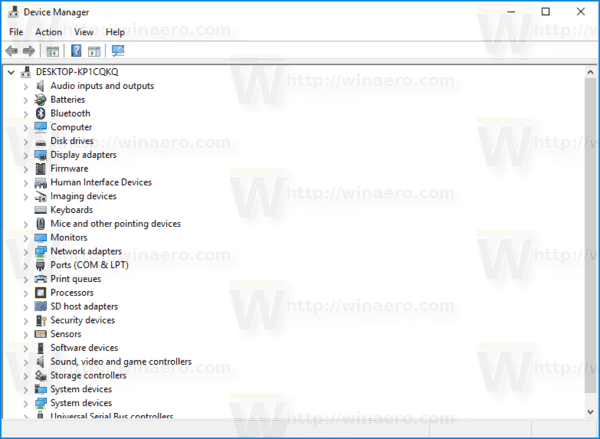
You are done.
Also, the classic Control Panel applet 'Sound' tin can be used to disable or enable a sound output device.
Disable a Sound Output Device using Control Panel
- Open the classic Control Panel app.
- Navigate to Control Panel\Hardware and Sound\Audio.
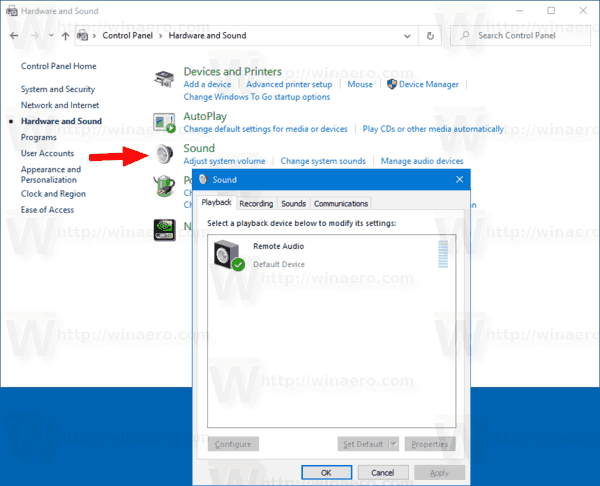
- On the playback tab, select the device you want to disable.
- Correct-click on information technology and selectDisable from the context card. This will disable the sound output device.
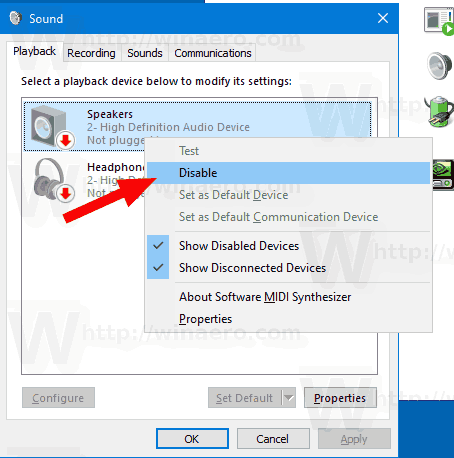
You are washed.
To enable a disabled audio output device, do the following.
- Ensure that y'all take the disabled devices listed: Right-click on any device and meet if yous have theShow disabled devices entry checked. If not, click on it.
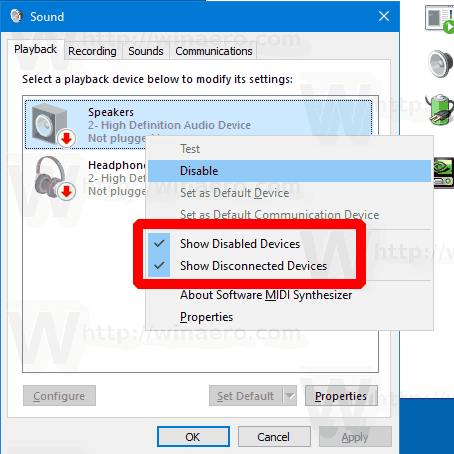
- Now, right-click on a disabled device in the listing.
- SelectEnable from the context card.
- This volition enable the disabled device.
Y'all are washed!
Tip: To save your time, you can open the classic Sound dialog using the following control:
rundll32.exe shell32.dll,Control_RunDLL mmsys.cpl,,1
Refer to the adjacent article:
Windows 10 Rundll32 Commands – the consummate list
Finally, you tin disable or enable a sound output device in the Registry. Here is how.
Disable a Audio Output Device in Registry
- Open the Registry Editor app.
- Become to the post-obit Registry primal.
HKEY_LOCAL_MACHINE\SOFTWARE\Microsoft\Windows\CurrentVersion\MMDevices\Audio\Render
Come across how to go to a Registry key with one click.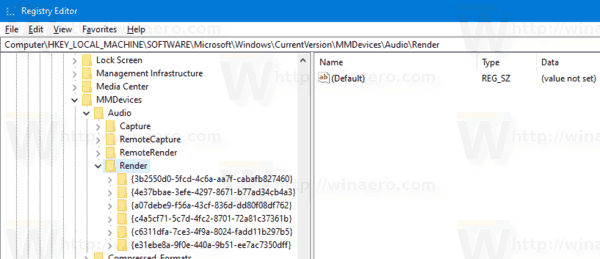
- In the left pane, aggrandize theRender key and open the Properties subkey of each GUID until you find the device you want to disable.

- On the right of the appropriate GUID key, modify or create a new 32-Bit DWORD value DeviceState.
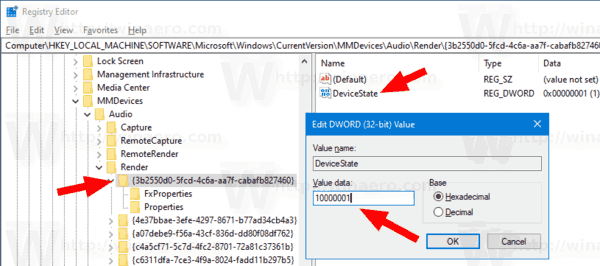
Notation: Even if you are running 64-fleck Windows you must still create a 32-flake DWORD value. - Set its value data to 1 to enable the device.
- A value information of 10000001 volition disable it.
That'due south it!
Articles of involvement:
- Modify Default Sound Input Device in Windows 10
- Rename Sound Device In Windows x
- Set Audio Output Device For Apps Individually in Windows 10
- How to Adjust App Sound Individually in Windows 10
- How to Change Default Audio Device in Windows x
- How To Open up Classic Sound Options in Windows x
- How To Enable Spatial Audio in Windows x
Support us
Winaero profoundly relies on your support. Yous can assist the site keep bringing you interesting and useful content and software by using these options:
If y'all similar this commodity, please share information technology using the buttons below. Information technology won't take a lot from you, simply it will help us grow. Cheers for your support!
Source: https://winaero.com/enable-disable-sound-output-device-windows-10/
Posted by: spriggspabis1949.blogspot.com
0 Response to "How To Remove Sound Devices From Windows 10"
Post a Comment